


Hello to all you passionate photographers out there!
I am thrilled to be with you again for this second article for the month of September, 2013 on the Manfrotto Imagine More blog, covering the theme “Taking discreet street photos: 3 techniques for great results”.
I’ll try to be more concise this time (will I be able???) since, last time, I went way over the expected article length…
But what can you do, since on photography generally and on street photography in particular, I can go on and on for hours, and I’m practically unstoppable on the subject: my modest blog on photography tips which hasn’t yet turned two years old already has more than 300 articles… it includes lots of chatter, but it also has some very crucial tips slipped in there as well (can you spot them in there?).
The other reason for these lengthy articles (a reason that’s even more important) is that there are things you need to know and I would be failing in my duty if I didn’t reveal these terrifically effective techniques that I’ve been given by others and that I really want to share with you in turn (I hope in fact that you’ll do the same and that you’ll pass the torch to your photographer friends).
Today, we continue on then with this chapter devoted to street photography with new, very concrete, practical exercises that you’ll be able to put in practice right after reading this tutorial (great results are right around the corner).
And remember: the marching orders you get on Manfrotto Imagine Blog are “Forget the blah-blah-blah and boring seminars”, and bring in the “good times and amazingly helpful and fun tips”!
And after “Street Photography: the method for achieving beautiful, spontaneous portraits!“, today on Manfrotto Imagine More, we offer 3 concrete techniques to take beautiful street photographs while you remain discreet (because something tells me that for now, there are more timid photographers among us – but don’t worry, I was also very timid when I was first getting started).
Technique 1: Hold your camera vertically at hip level (or horizontally at chest level) and snap shots “whenever the fancy strikes.”
This technique might ruffle some feathers but the truth is that it is tried and true after being tested on the ground during lunch breaks in Hanoi on many occasions (days when I was feeling a little lackadaisical and put forth “minimal effort”).
So, yes, it’s true: this technique is absolutely not scientific, nor very rigorous, so the result is lots of blurry, off-centered photos,… but you’ll also see some great surprises.
The principle is simple:
- Put your camera on automatic mode without flash (you’re wagering on discretion, so it would a shame to unmask your intentions with an unwanted flash to alert your subject)
- If you have a Reflex camera, choose a wide focal distance (between 18mm and 24mm, for myself, I had chosen 18mm on an APS-C body)
- If you’re a pro, replace the automatic mode without flash to priority mode aperture an aperture of F5.6 / F8 (approximately) to increase the sharpness area (the idea is to be in hyperfocal)
- Place your camera at the height of your chest (horizontally) or along the right side of your body (near your hip or thigh)
- Walk around at random down the streets and snap to your heart’s content or whenever you observe an interesting scene… “let luck by your guide” (since you’re not seeing through your lens, you’ll snap shots randomly without looking)!
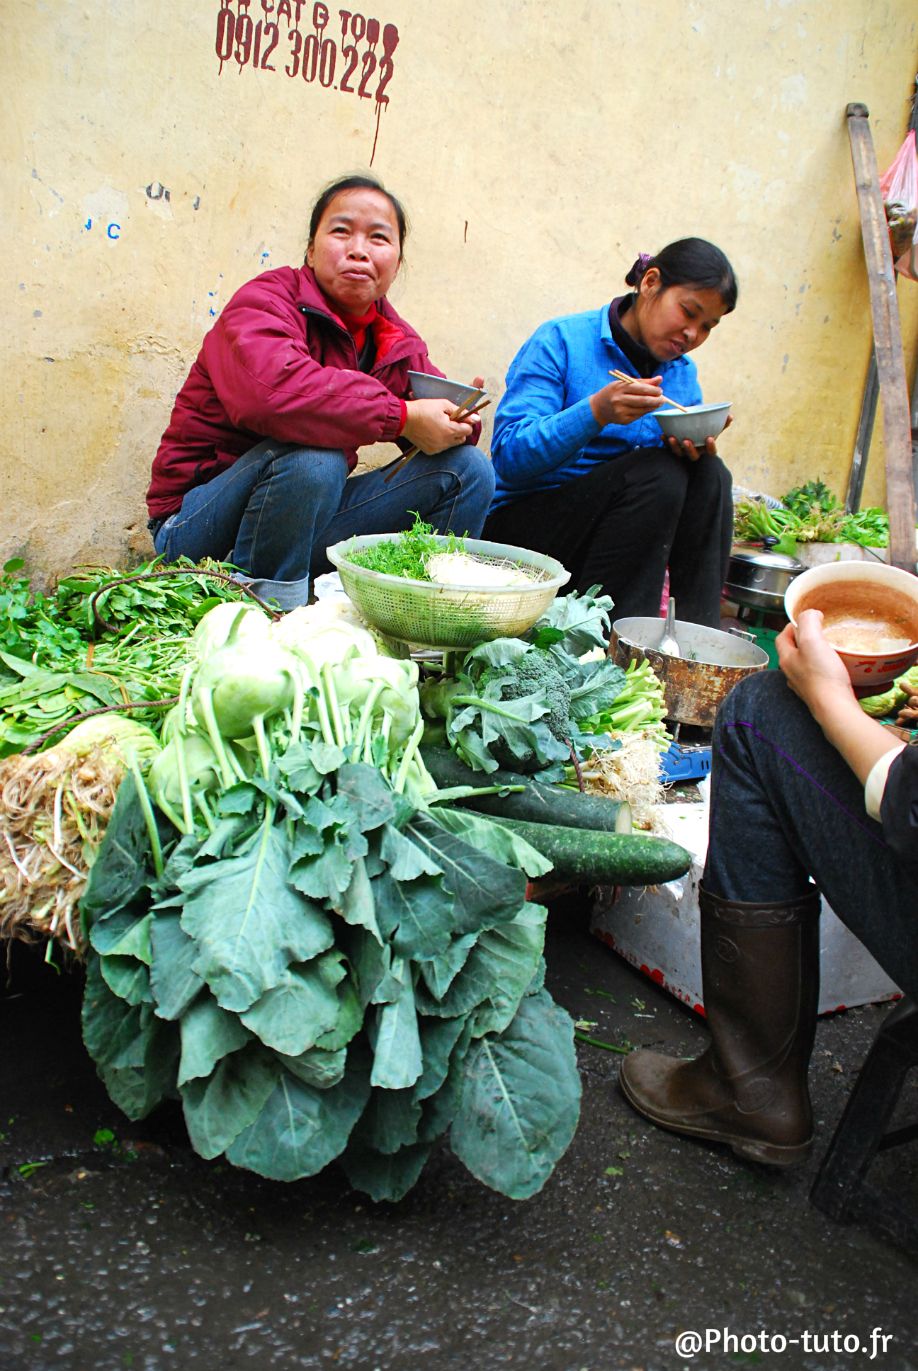
(Here is one of my favorite pictures taken using this technique!)
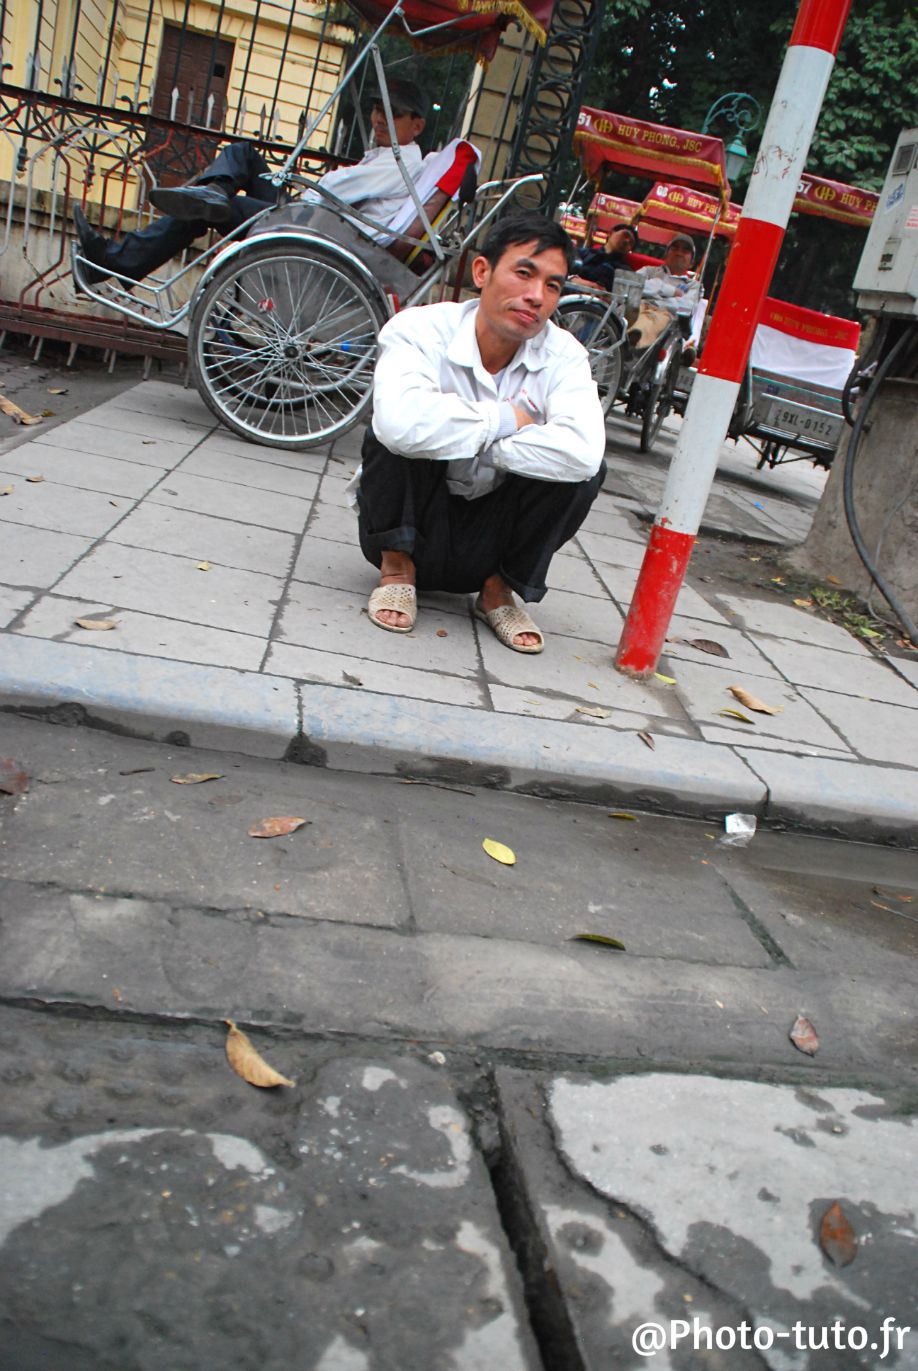
(On this particular shot, I think I raised the suspicions of the cyclist…)
Technique 2: Use your LCD screen (especially if you can adjust it)
An adjustable LCD screen is (in my opinion) the most revolutionary tool of the last few years in photography for low-end cameras (it’s sort of the equivalent to telephone touch screens today).
Anybody who tells you that the adjustable screen is just a gadget is really mistaken (they’re just the unfortunate ones who have never had the chance to have one in their hands and so they’ve never gotten to use one, that’s all it is).
The adjustable screen has the dual advantage of allowing you to:
- obtain photos with original perspectives and viewing angles
- to photograph with complete discretion in the street (or even in family settings)
I am so convinced by the usefulness of the adjustable screen that, when I got my next camera (I wanted a new Reflex camera), even though at first I wanted to upgrade to a semi-pro model I finally opted for an amateur camera because, THAT ONE featured an adjustable screen (unlike the semi-pro camera that I was looking at getting at first).

(Here is an incomplete list of the equivalent features for cameras from different manufacturers: Nikon => D5100, Canon => 650 D, Sony => Alpha SLT A57, Pentax => K-30)
That’s right, my opinion isn’t dictated by the “what the marketing people want you to think” (amateur (vs) expert (vs) pro).
I was sure I would achieve much more interesting shots with this amateur camera and its adjustable screen than with this other semi-pro camera without the adjustable screen.
(That said, if some photographer friend wanted to loan me a full-sized Nikon D800 or Canon 5D Mark III to get me to change my mind, I would certainly have to give it a test drive…)
To this day, I have never been sorry about the choice I made.
Not for a single second! (and I also saved some money)
With the adjustable camera screen I was able to take photos like the 2 below (in both cases I was very close to my subjects without them even knowing that I was photographing them… You could get the same results).
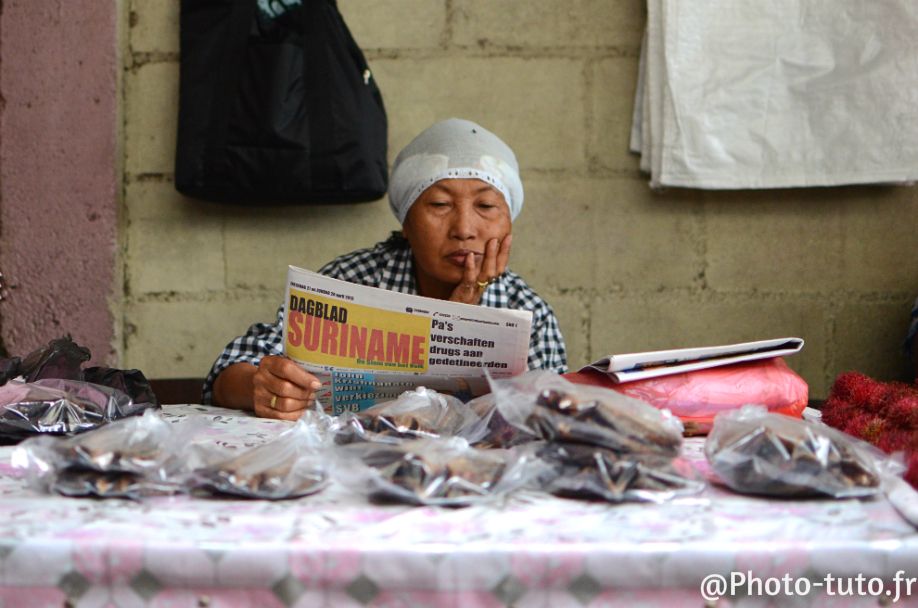
(This merchant was peacefully enjoying her paper in the market in Paramaribo)

(One evening out in Suriname, I spotted this group of young girls in an animated conversation)
Technique 3: Stop somewhere with people passing by and wait
This is a variation on the tip “Good things come to those who wait” which we brought up last week in our tutorial “Street photography: the method to achieve beautiful spontaneous portraits! ».
This tip is so effective (and easily achieved) that you’ll get interesting photos at least half the time!
Let’s get settled in:
- Find a lovely setting/background, some spot typical of your location (the gates of a gracious townhouse in Paris, a structure bearing inscriptions in the local language, a wall with graffiti, etc.)
- Place yourself across from this compelling backdrop and set up your frame
- Wait for something to happen, for a subject to pass just in front of you and then click click– start shooting!

(In Luang Prabang, this background was an ideal backdrop)

(All I needed to do was wait for some monks to pass by!)

(A bridge in Laos – I had no idea what the sign says, but I liked the scene)

(I just had to wait for a motorcycle to whiz by!)
There you are, today’s tutorial is coming to an end (and once again, I didn’t manage to be too concise…sorry).
I understand that these “discretion” techniques might be kind of difficult for some of you (as you think about the rights of the person who is being photographed).
So rather than go on at some length about this subject in this article, may I suggest you read this post on my blog where you’ll find perhaps some initial responses to your questions (I give my truly honest opinions): Street Photography: are your photos “dishonest or immoral”?
And in conclusion, the team at Manfrotto Imagine More and I hope that, even if you are one of the timid ones out there, these 3 techniques will give you the spark to take off in the genre of street photography (after all, in photography, practice is all-important!).
So, this week, get your camera ready and every lunch break get out there and put these 3 techniques to work!
Then get back in touch with us and share your experiences by sending us comments (if you have photos to share, that would be even better)
Meanwhile, we’ll see you next week with a new article on street photography. We’ll reveal 3 locations you should not miss to take great street photography shots.
Thanks for spending your time with me and thanks to everyone who has shared articles on social networks and with photographer friends!
Maïeva Voyage
Maïeva Voyage is a passionate amateur photographer who discovered photography completely by chance 4 years ago when someone gave her a Reflex camera as a gift and it changed it her life.
She developed her photographic techniques especially in Vietnam through the Photo Club of Hanoi.
Since then, she constantly badgers her friends and family to get them to pose and she talks about her photography with them whenever she isn’t busy updating her blog on women’s photography at Photo-tuto.fr with the secrets she has picked up from friends or her favorite photographer-authors (always with good humor and with a decidedly relaxed attitude).
Maïeva Voyage is our invited author for the month of September.
You can also follow her on her Blog
Or on Facebook
Or on Twitter