


Breaking out of your daily routine isn’t always an easy thing to do. Culinary photography is no exception. In fact, it is difficult to keep things fresh.
Sometimes I feel like doing something other than taking photos staged on fictional arrangements. That’s why I also look out for scenes that my environment might offer me.
Dare to take your efforts outside! 🙂 Here are some tips to get started.
1- Plan your outing
Photography outdoors require strong organization and front-end preparation because once you’re outside, you can’t really go back to the kitchen to get an extra knife, chop up more herbs, or change out the table cloth.
So, you might want to think over the scene. Choose what you want to carry out in your photo session. What surface are you going to put your dish on? What presentation do you want to give it? A plate? Glasses? A casserole dish? Do you need silverware? Perhaps a dishcloth or a napkin? Would you like to sprinkle some herbs or place some fruit around the dish?
Try to visualize your scene. If it will help, try it out in your home to give it a trial run. Keep it simple. Generally, it’s the environment that will really bring substance to your photographs. Don’t overcrowd the scene if the environment is already visually rich.
I recommend taking the minimum quantity of china and decorative items so you don’t have to struggle with transporting what you need. Maybe you could call a friend to help you? And to say thanks, you can invite that person to enjoy the dish with you once you’ve photographed it!
When you think about taking pictures outside, of course the ground comes to mind as an ideal subject. Make sure to bring a cloth you can get down on to keep from getting dirty out there.
Another practical point: get some absorbent paper towels to wipe the china you’ll want to clean off.
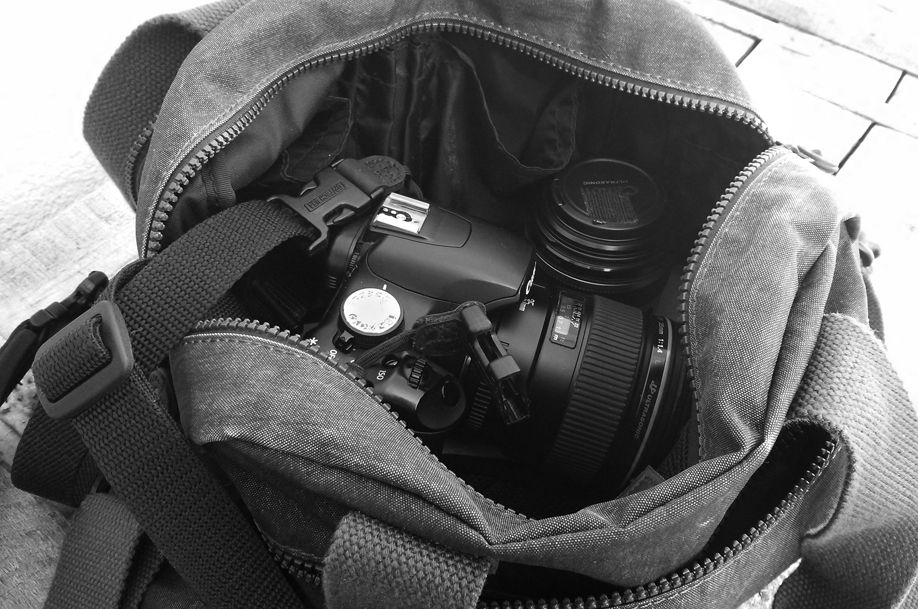
Before you leave, check on your equipment: is the battery sufficiently charged? Did you put in your memory card? Do you have the right lens? Is it clean? These seem like such obvious concerns, but if one of them is ignored, the effects can really ruin a photo session.
2- Where should you go?

This pizza with pears and popcorn was photographed in one of my favorite spots in the forest.
There are so many spots that can give an original atmosphere to your photographs.
Think about the various green spaces nearby your home. These verdant spaces will be the perfect setting for your photographs. Forests are an environment that I am particularly fond of.
Parks are an interesting place. You can use park benches or wooden tables. Grass can help you create a picnic type of ambiance. But you don’t have to go too far for that. Your garden is all you need!

I used a picnic table along the Seine River to create a composition with these baked apples with maple syrup and crêpes. The snowy day was perfect for this session. This is the kind of recipe people will love in winter.
When you live on the seashore, you take advantage of the beach. The dunes are ideal for a wild and summery atmosphere.
Or at the other end of the extreme, you can recreate an urban and laid-back world (photo below) with concrete steps. What attracted me was the raw texture and the contrast that brings out the colors of the tart and the cloth. With this type of environment, it’s wonderful to have a bit more fun with your graphic design skills.
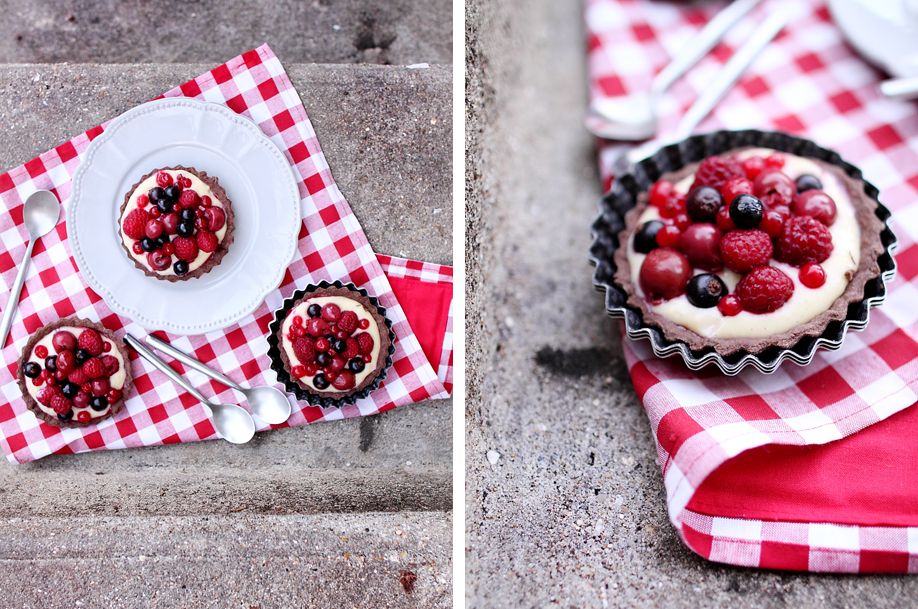
Session shot on a raw staircase for these red berry tarts that are so vibrantly colored.
You can take it even farther. Do you live out in the countryside? Do you happen to have a tractor at your disposal? Why not use the tractor’s frame to photograph a country recipe and lay down a straw hat in the background?
Do you have a lovely flower patch nearby? Enjoy this type of space for photos that are both Bohemian and romantic? Frame your shot so you can include flowers so you can add some utterly beautiful colors to your photograph.
3- How can you plan for weather conditions and outdoor lighting?
Outdoor photograph may not be the easiest. The light is obviously much more of a factor than indoor photography, and that’s exactly what is most difficult to manage.
Don’t photograph outdoors on days where there’s a lot of sun. You might wait till the end of the day when the sun is going down and take advantage of softer lighting.
With sun in your scene, shadows are prominent, the light too warm, and colors are washed out. The results in the end might be mediocre.
Opt instead for overcast days where the light is filtered and the results will be much more natural.

Cloudy (but rain-free) days and late afternoons when it’s sunny are by all accounts the best moments for culinary photography, but you can also take great photographs on snowy days! The photo session is certainly more delicate when it’s cold and humid outside. But the results are magical.
I live in a region where snow doesn’t fall that often, and so I waited with impatience for the snow to fall so I could plan my photo session. I already had in my head the place and the recipe, so I just needed the right weather conditions.
4- The post-processing work

The “post-processing” setting is recommended if you want to wake up and even perfect your culinary photographs. And this is even more true when we’re talking about outdoor photographs. In cloudy weather, photographs are undoubtedly going to lack contrast. Don’t hesitate to add more to really get your picture to pop. That’s what I did with the photo above. The raw photo is on the left, and the retouched photo is on the right. I also adjusted the operations to enhance the material.

In the forest, as in the photos above, the colorimetry will also need to be adjusted. The photos come out yellow/green. The hue of the forest is transfered onto the scene to be photographed. So you’ll need to put the whole thing into balance in the post-processing phase to restore a natural and enticing color.
Finally, when you want to take a photograph in a snowy landscape, you will need to address a major difficulty: managing the white tones. When you are taking your pictures, slightly under-expose them so the snow will appear a little gray / dull. Then, in post-processing, you will be able to add luminosity on the snow to make it naturally whiter. Using layers, you can mask the part that concerns your dish if that isn’t what needs more luminosity.
Snow also tends to turn blue in photos, so there too you’ll need to balance the whites to warm them up a little and make them look a little more natural.

5- What should you take pictures of?
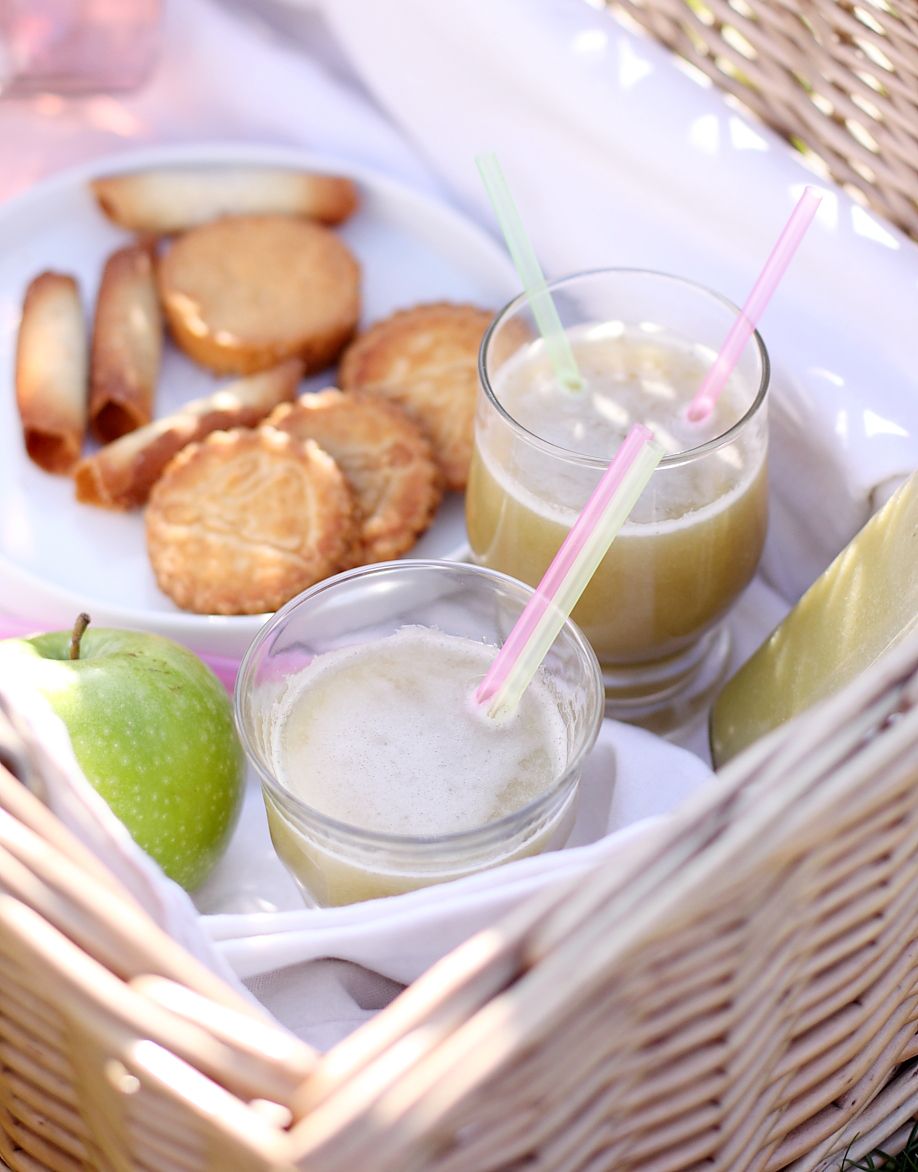
Fruit juice really lends itself well to a summer ambiance, to a picnic. No need to go far afield. Your garden will do just fine.
Start with recipes that are easy to transport. Avoid sauces if you can. Cakes, cookies, muffins, and sweet or savory pies are practical choices. You can also photograph smoothies, fruit juices, and soups. Transport them in a bottle. Make sure you also comply with cold chain procedures, especially if you’re working with ingredients that could quickly spoil in hot summer weather. An ice chest and a bag of ice will be crucial.

To ensure that there is an organic connection between the recipe and the location, you might first pick the place where you want to photograph and then prepare the recipe(s) you want to associate with that environment. A savory mushroom cake in the middle of the woods, an apple pie on an old wood table, gaspacho on the beach…in the photo above, there is a clear connection between the setting and the dish. A bed of ivy leaves makes the perfect backdrop for some Black Forest muffins.
Choose recipes you can cook in advance and which can keep as you prepare your photography outing. Imagine that the time isn’t right for a photo session, so you have to put it off for later.

To the left, some autumn pears set out in a verdant scene. To the right, you can select an orchard or vegetable garden to take pictures of fruit or vegetables dishes, recalling the origin of the products you’ve prepared.
You don’t have to photograph just the dishes you’ve prepared. Maybe you just dug up some carrots? Maybe you have an apple or peach tree, or some raspberry bushes? If that’s the case, go ahead and get out your camera to take pictures of the fruit while they’re still on the tree, your vegetable bounty with the dirt still on it arranged in a wood basket, and place some gardening gloves to the side. Or when you’re off to collect some fresh eggs, take a picture of them while they’re still in the basket. If you’re lucky enough to live in the countryside, have fun in your environment.
6- What do you do when people look?
When you’re taking photographs in a public place, you will of course be confronted by the looks of passers by. Take pictures of apples in a snowy park or little tarts on concrete steps, and of course you’ll certainly not escape notice!
Of course, people will ask you what you’re doing. They’ll be intrigued, perhaps amused, and of course pique their interest. Some will ask you what you’re doing and what kind of dish you have prepared. It’s a great chance to meet people and chat.
If you’re shy, you’ll prefer quiet places or times of the day when few people will pass by. Forests are the perfect spot, and it’s easy to hide!
You can also bring along a friend for company.
And if you have a garden, take advantage of it! You can easily compose your scenes away from prying eyes. It’s a great way to get to know outdoor culinary photography.
I hope this third article has inspired you to take some steps off the beaten path. Let’s meet again next Sunday for my final article. This time, I’ll invite you behind the scenes on a photo shoot.
Chef Nini
Under the pseudonym of chefNini, Virginie has kept a culinary blog by the same name since February, 2008. It features her creations, her inspirations, and her tips presented through instructive articles.
Autodidact and passionate about her interests, she decided to quit her job as a web developer to devote herself exclusively to her blog. In September, 2011, she became an entrepreneur, offering her services as a creator, photographer, and culinary writer.
She is also the author of a book on culinary photography published by Pearson.
Blog: http://www.chefnini.com/
Portfolio: http://portfolio.chefnini.com/
Facebook: http://www.facebook.com/chefNini/
Twitter: https://twitter.com/chefNini