

Dear Manfrotto readers, hello!
We are continuing our series of “Special Holiday” tutorials and after the 5 photography ideas to try while Christmas shopping I gave you last week, here is another special year-end tutorial called “Christmas lights in your town: the three camera settings to use to take photos of them at night“.
The problem often with Christmas lights photos, is that they are:
- Either blurry
- Or too bright / too dark
- Or you don’t fully recapture the magic you felt when you were taking the photos of these lights
Good news! Today, you’ll discover some tips to overcome these classic problems (or perhaps just work around them) thanks to 3 very handy settings on your camera.
SETTING N°1: THE SEMI-AUTOMATIC SPEED PRIORITY MODE
At night, often you get photos that are more blurry than you would get in daylight.
Why? Because your camera needs longer exposure time to record your image on the sensor.
So, when you’re talking about longer exposure time, you’re also talking about the chance for blurry photos.
So here is the solution:
-either increase the exposure time in order to capture movement and get the sharpest photo possible
-or take advantage of this slow speed to photograph tracking effects (like tracks of lighting from motor cars for example)
Tip: to get this effect, you will use the Semi-Automatic Speed Priority Mode which is available on Reflex cameras, Bridges, and Expert Compact cameras.
To use this setting, select the “S” or “Tv” setting (it all depends on your brand of camera), then select a slow speed (from the fastest to the slowest: … 1/1250s… 1/800s… 1/500s… 1/125s… 1/50s… 1/25s… 1/10s… 1/5s… 1s… 2s… 5s… 10s….).
And of course, for even more stability, use a stable support (like a low wall, for example) or a tripod (if you have one).
 Exifs: 55mm, F5.6, 1/20s, ISO 1600 (Tamron 18-200 lens)
Here the speed is set at 1/20s.
 Exifs: 38mm, F4.8, 1/5s, ISO 1600 (Tamron 18-200 lens)
The 1/5s speed here is slower than with the previous photo, so that’s where the “headlight tracking” effect comes from.
SETTING N°2: CORRECTING THE EXPOSURE
At night, your camera tends to give you pictures that are a lot “brighter” (also known as “over-exposed”) than what you really see.
“This default” is meant to be a “technical tool” to make your life easier: your camera is telling you “whoops! it’s dark, so I’m going to make it so everything’s really bright!”
The problem is that when you’re taking pictures of Christmas lights, generally what you want is to have a darker scene so that the beautiful Christmas lights really pop.
So you’ll have to tell your camera to expose the image less and to do that there is a really useful and easy setting to use : the Exposure Corrector.
Tip: Go to the menu and select the “Exposure Correction” setting (this setting is illustrated by a small pictogram that has a “+/-“). I believe that all cameras have this setting. You’ll even find it on a number of cell phones that have a camera function.
By default, your camera is set at 0. To get a darker photo (or to “under-expose”), you’ll select “-1” or “-2” or even “-3” (on the other hand “+1”, “+2”, or “+3” will achieve photos that are brighter and brighter).
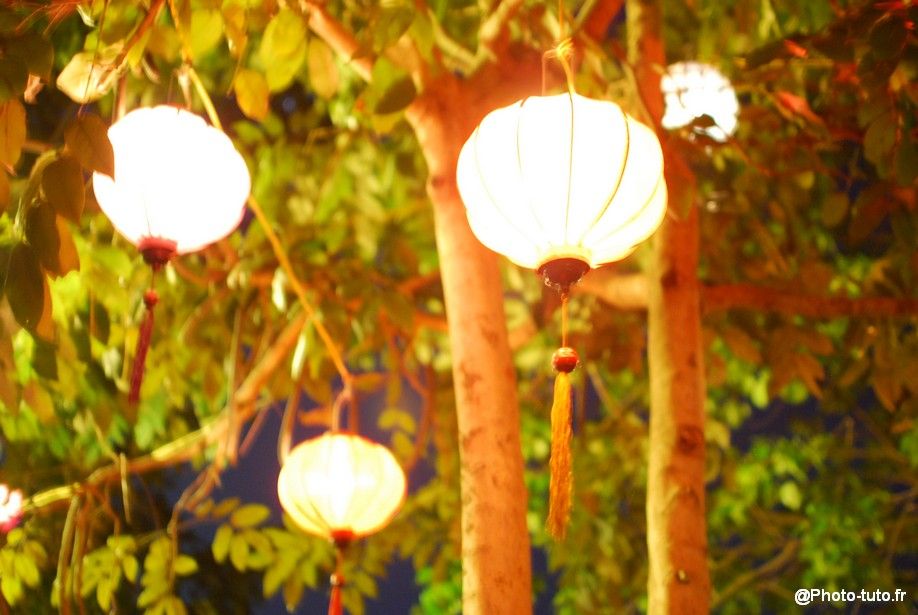 Here the photo is too bright, too “over-exposed”. Lights like these are also described as “burned”
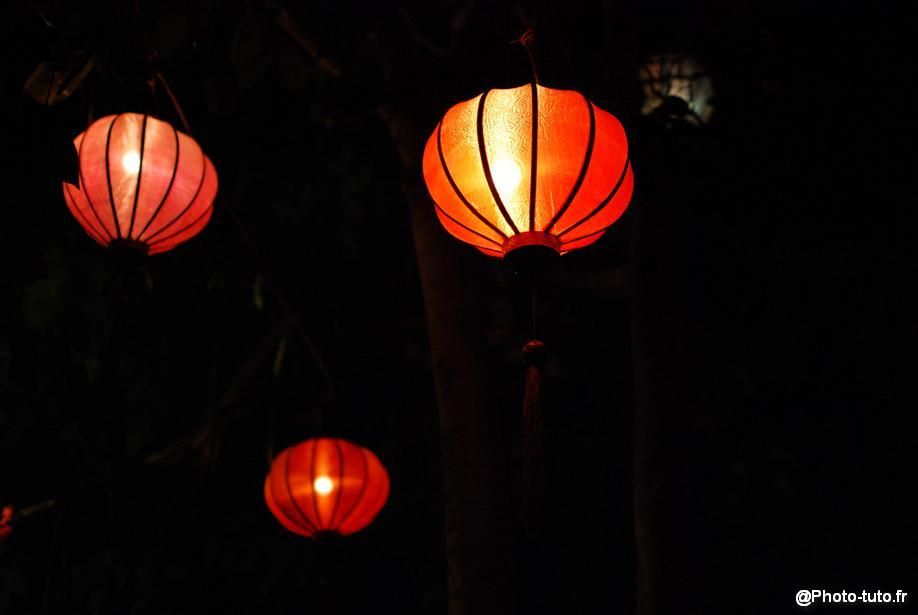 By setting the Exposure Correction at “-2” or “-3”, you’ll get a nice dark background and colors that are actually correct.

 Another Before/After example: under-exposure in the photo below gives you a darker background so you get really nice colors (not “burned”) and that really showcases the lights.
SETTING N°3: THE SEMI-AUTOMATIC APERTURE PRIORITY MODE
The other issue when you’re taking pictures of Christmas lights is that often you have the sense that the effect isn’t as magical as the spectacle you have before your own eyes.
But there is a silly little trick that will give your pictures of holiday lights and other Christmas lanterns a more magical look and for that you’ll need the “Aperture Priority” (a setting I already mentioned in last week’s tutorial).
Tip: The Semi-Automatic Aperture Priority Setting is available on Reflex, Bridges, and Compact Expert cameras.
To use this setting, select the Aperture setting of your camera (scroll along till you get to the A or Av semi-automatic setting, depending on the brand of camera you’re using) and choose a large aperture, which means a small number after the F : F 1.2, F1.4, F1.8, F2.8, F3.5… (the brighter your lens, the more you can choose a small F).
Next, chose a typical outdoor Christmas decorative object (a snowman, a sleigh, a giant gingerbread house, etc.), place yourself in such a way that you’ll have all the lighting far beyond your subject, and then move in as close as possible, put the focal point on this object, and then you’ll just have to click and, then poof!, all the decorations turn out just like magic !

Exifs : 35mm, F1.8, 1/25s, ISO 800 (Nikon 35 mm 1.8 AFS G lens)
Above, I took a picture of a typical object, a cone-shaped hat. I positioned myself in a way that all of the lamplights are in the distance. Then, I just had to put the focal point on the hat, then I selected a large aperture (F1.8) and all of the lights in the background turn magical….
We’ll actually talk about this final tip again next week in another “Special Holiday” tutorial but we’ll be indoors next time (and yes, we’ll talk about Bokeh).
Now it’s time for you to talk back and share your comments:
- Do you like to take pictures of Christmas lights?
- What tips do you have to share for taking great pictures?
- Do you have links to your photos you want to share with us?
Maïeva Voyage
“Women have things to say in the world of photography too!”, that’s the leitmotiv of Maïeva Voyage.
Mingling with passionate and exciting amateur and professional photographers at the Photo Club of Hanoi, Maïeva Voyage developed her photographic techniques.
Here she shares her advice and useful tips on Photo-tuto.fr, her feminine photo blog with fun and off-the-wall tutorials.
For the third time, Maïeva Voyage is the invited author of Manfrotto Imagine More.
She’ll be on the site throughout the month of December 2014 for the “Special Holiday” tutorials.
Maïeva Voyage on the Web:
http://www.photo-tuto.fr
https://www.twitter.com/Photo_tuto_fr
https://www.facebook.com/Blog.Photo.Tuto.Fr
http://instagram.com/photo_tuto_fr