

A hand reaching for a muffin, a spoonful that’s just about to be tasted, a pastry in your hands…all of these scenes that include the presence of a person will bring life to what might otherwise be very mundane pictures of food. The presence of a person in the shot will immediately give it a different feel and more warmth and energy.
You can suggest this type of presence in the photo in a number of ways. It’s not always easy to achieve when the photographer actually has to stand in front of the camera too.
You’re going to need that indispensable accessory: the tripod. If you have no other use for it, there is no need to invest in a very expensive tripod. Without a tripod, the options for including yourself in your photos are very limited.
A remote control is also highly recommended, but it isn’t necessarily a must (although in some situations it will be a great help to you). It lets you take a shot from a distance without having to move from your spot. If you don’t have a remote control, you can use the timer on your camera. Then you’ll have a few seconds to get back into place before the photo is taken.
The method used to include yourself in the photo will vary according to what you want to achieve. Of course, taking a picture with your hands in the background will not require the same technique as when you want to shoot a self-portrait.
Here I want to show you some different arrangements and explain how I managed to take the shots all by myself.
– Suggesting the presence of a person in the background
If you simply want to add your presence to the photo, I recommend putting your hands into the background of your shot. Why? Because you won’t have to worry about focusing on your hands.

Placement will be easy: place your camera according to how you want to frame the shot. Think about how you want to include your hands in the picture. Adjust the shot so it focuses on the dish you’re photographing.
Then you just have to hit the timer on your camera (or use your remote), and put yourself in the background and wait for the photo to be taken.
You can show yourself eating, preparing the dish, or setting the table, depending on the story you want to tell. Play with the depth of field to make your background sharper or more out of focus, and that will bring your hands either into or out of focus too.
– Put your viewer in your place
Another technique involves putting the person who will see your photo in your place. What this means is that you are going to take the picture from behind the camera as usual and you’re going to place your two arms on either side of the tripod in such a way that they get included in the bottom of picture, as in the examples shown below.

To take this type of picture, place your camera on the tripod. With your right hand, you’ll take the picture. With your left hand, you’ll hold the object you’re photographing.
As much as possible, avoid layering planes. If necessary, move the elements of your decor around to make it easier to read the image. Choose a large aperture (low field depth) so you can really remove your subject from the background. Lastly, incline your camera to 30° to reinforce the impression of “projection” in order to give your scene a natural view, the one you get when you’re sitting at the table.
You can achieve this view without a tripod if you have a small camera. It is a lot trickier to do with a reflex, but it’s feasible. All the photos above were taken that way.
– Try taking a shot from above
Pictures taken from above are really nice, and they let you get a hand into the scene very easily.
To get shots like that, you need a tripod that can put your camera parallel to the floor and you need a remote.

These shots are also really simple to set up.
Place the camera according to how you want to frame the shot and how you’re going to include your hands in the picture. Check on the aperture/speed ratio.
Set the focus on the object that you want to see clearly. Take a picture without you in it just to see whether you like the shot.
Put your remote in delay mode. Click and then put your hands into the scene and wait for the camera to take the shot.
Check out the results and if you need to, go ahead and adjust the framing or placement of your hands so that the picture meets your expectations.
In the examples above, (from left to right) the gratin dish was the object in focus (I simply added my hands to the sides at the last minute), then the chicken (I added the brush after), then the waffle (the one I was taking with my hand).
– Place your hands in the foreground
Same as with the previous point, but the view is more classic, and you’re adding your hands into the foreground
Perform some kind of action to create atmosphere or tell a story.

In the photo on the left, I introduced myself into the scene to slice this lasagna in order to show that it’s time to sit down at the table. In the photo on the right, I created the relaxed atmosphere surrounding appetizers and a pre-dinner cocktail. You can see one of my hands holding a toothpick (that’s where the focus is), and my other hand is holding a glass.
– Shoot a preparation stage
You might want to show a stage in the preparation of the recipe you’re making. This will complicate the setup somewhat. In fact, you’ll have to take this shot blind. Some pictures will be a little simpler, as shown below. I arranged my cream puffs and set the focus in advance. I used the delay feature. After clicking, I started to fill a cream puff, and with the delay the photo was taken right in the middle of the action. Make sure you’ve got the right speed so that the action is really clear and immobilized in your shot.

But other pictures will be much more complicated and will require several shots in order to get the right picture. That’s the case with the photo below, for example.
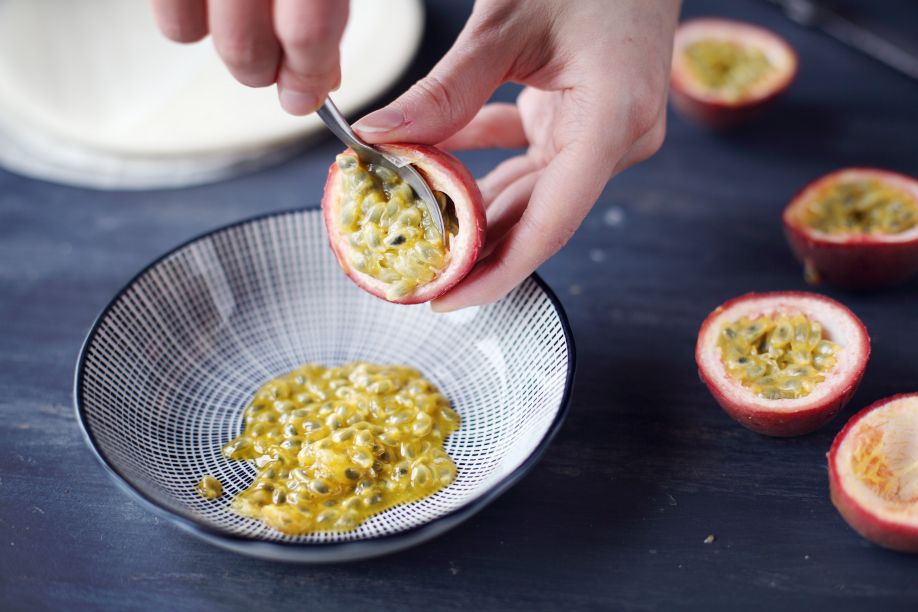
How is it more difficult? While you’re behind the camera adjusting settings, your hands and the subject of the photo (in this case, the passionfruit) won’t be behind the camera. So, you are blindly adjusting the camera settings.
Unlike what you might expect, you need to maintain automatic focus. The idea is that you’re placing the collimator on the spot where you are going to have your hands. Place an object there to help you get it right.
Put yourself in front of the camera, set the delay function, click, and then hold the pose you want. For this type of photo, I always take pictures of the beginning of the action, because once the action is complete, it’s too late to get anything.
This photo will require a few test shots. But sometimes, with luck, the first shot will be the right one! 😉
– Your hands, the only subject
Break away from the classic composition and use your hands to hold the dish. You can use your body as the background.

Of all the points I’ve mentioned, this is the most complicated one to achieve by yourself. You’re going to take the shot remotely, without being able to verify the image through the viewer, without knowing exactly where you are in the frame, whether you’re too far away or too close, or whether the collimator is exactly where you want it…
So how do you do it?
Place an object (a floor lamp is ideal) in the spot where you’re going to place yourself.
Place yourself right next to it and strike the pose you want. Put a piece of tape or a post-it note on the lamp to mark the height of your hands.
That way you can more easily adjust your camera’s settings. You can also place the collimator on the mark. Keep the automatic focus.
You just have to put yourself in the same spot as the floor lamp and then shoot. Once again, keep the automatic focus.
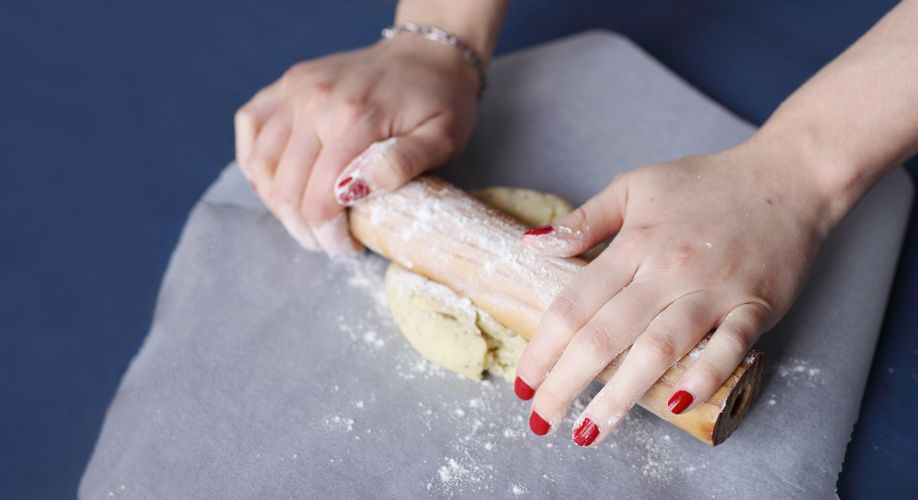
A final tip for women, and maybe men too.
Make sure your hands are clean (unless you’re in the process of taking a picture of rolling out pastry dough In that case, of course they’ll be covered in dough. ), and your nails will be dirty too.
Women may want to wear nail polish just too add in some extra color. But make sure you use cohesive colors in your scene so they don’t clash.

chefNini
Under the pseudonym chefNini, Virginie has written a culinary blog by the same name since February, 2008. She shares her recipes, technical articles, purchasing guides and test products.
Since 2011, she has offered photography, styling, and culinary creativity services.
She has written a book on culinary photography published by Pearson, as well as a Cooking Almanac published by Editions 365.
Blog: http://www.chefnini.com
Portfolio: http://virginiefouquet.com/
Facebook: http://www.facebook.com/chefNini/
Twitter: https://twitter.com/chefNini
Instagram: https://instagram.com/chefnini_blog/